Project Lucy
At the University of Kent, I am part of the TinkerSoc, where we create all sorts of different projects.
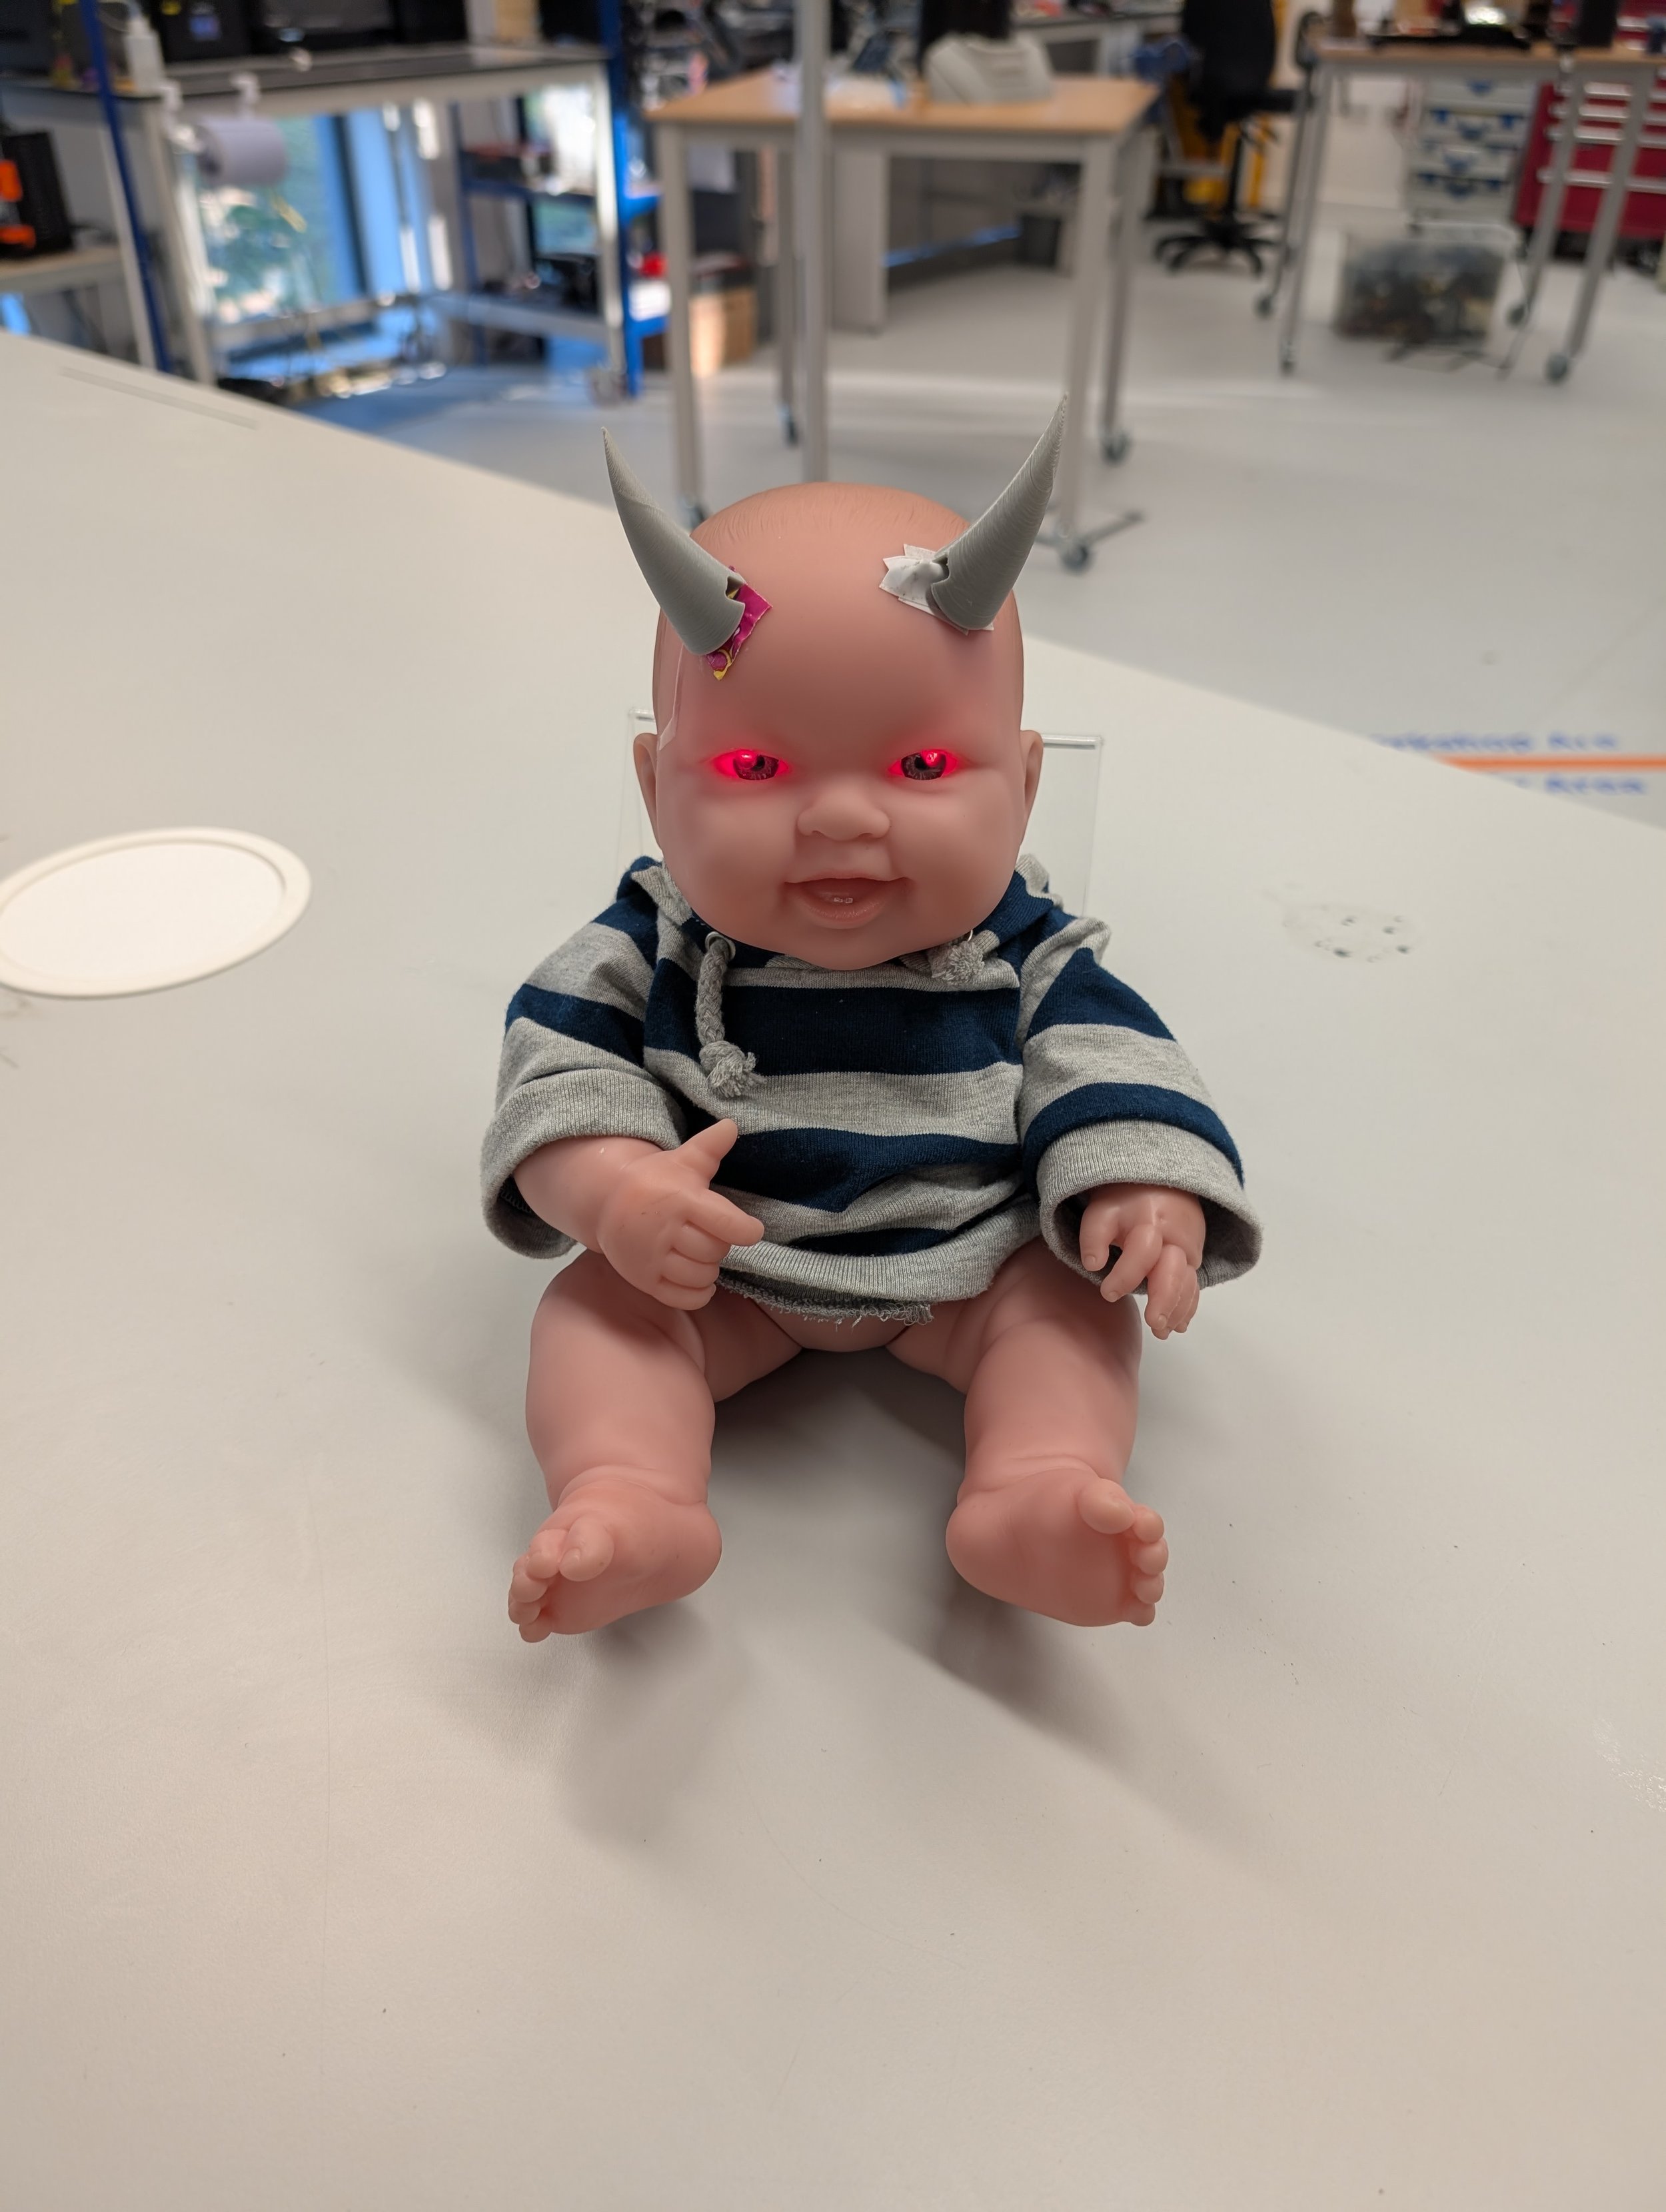
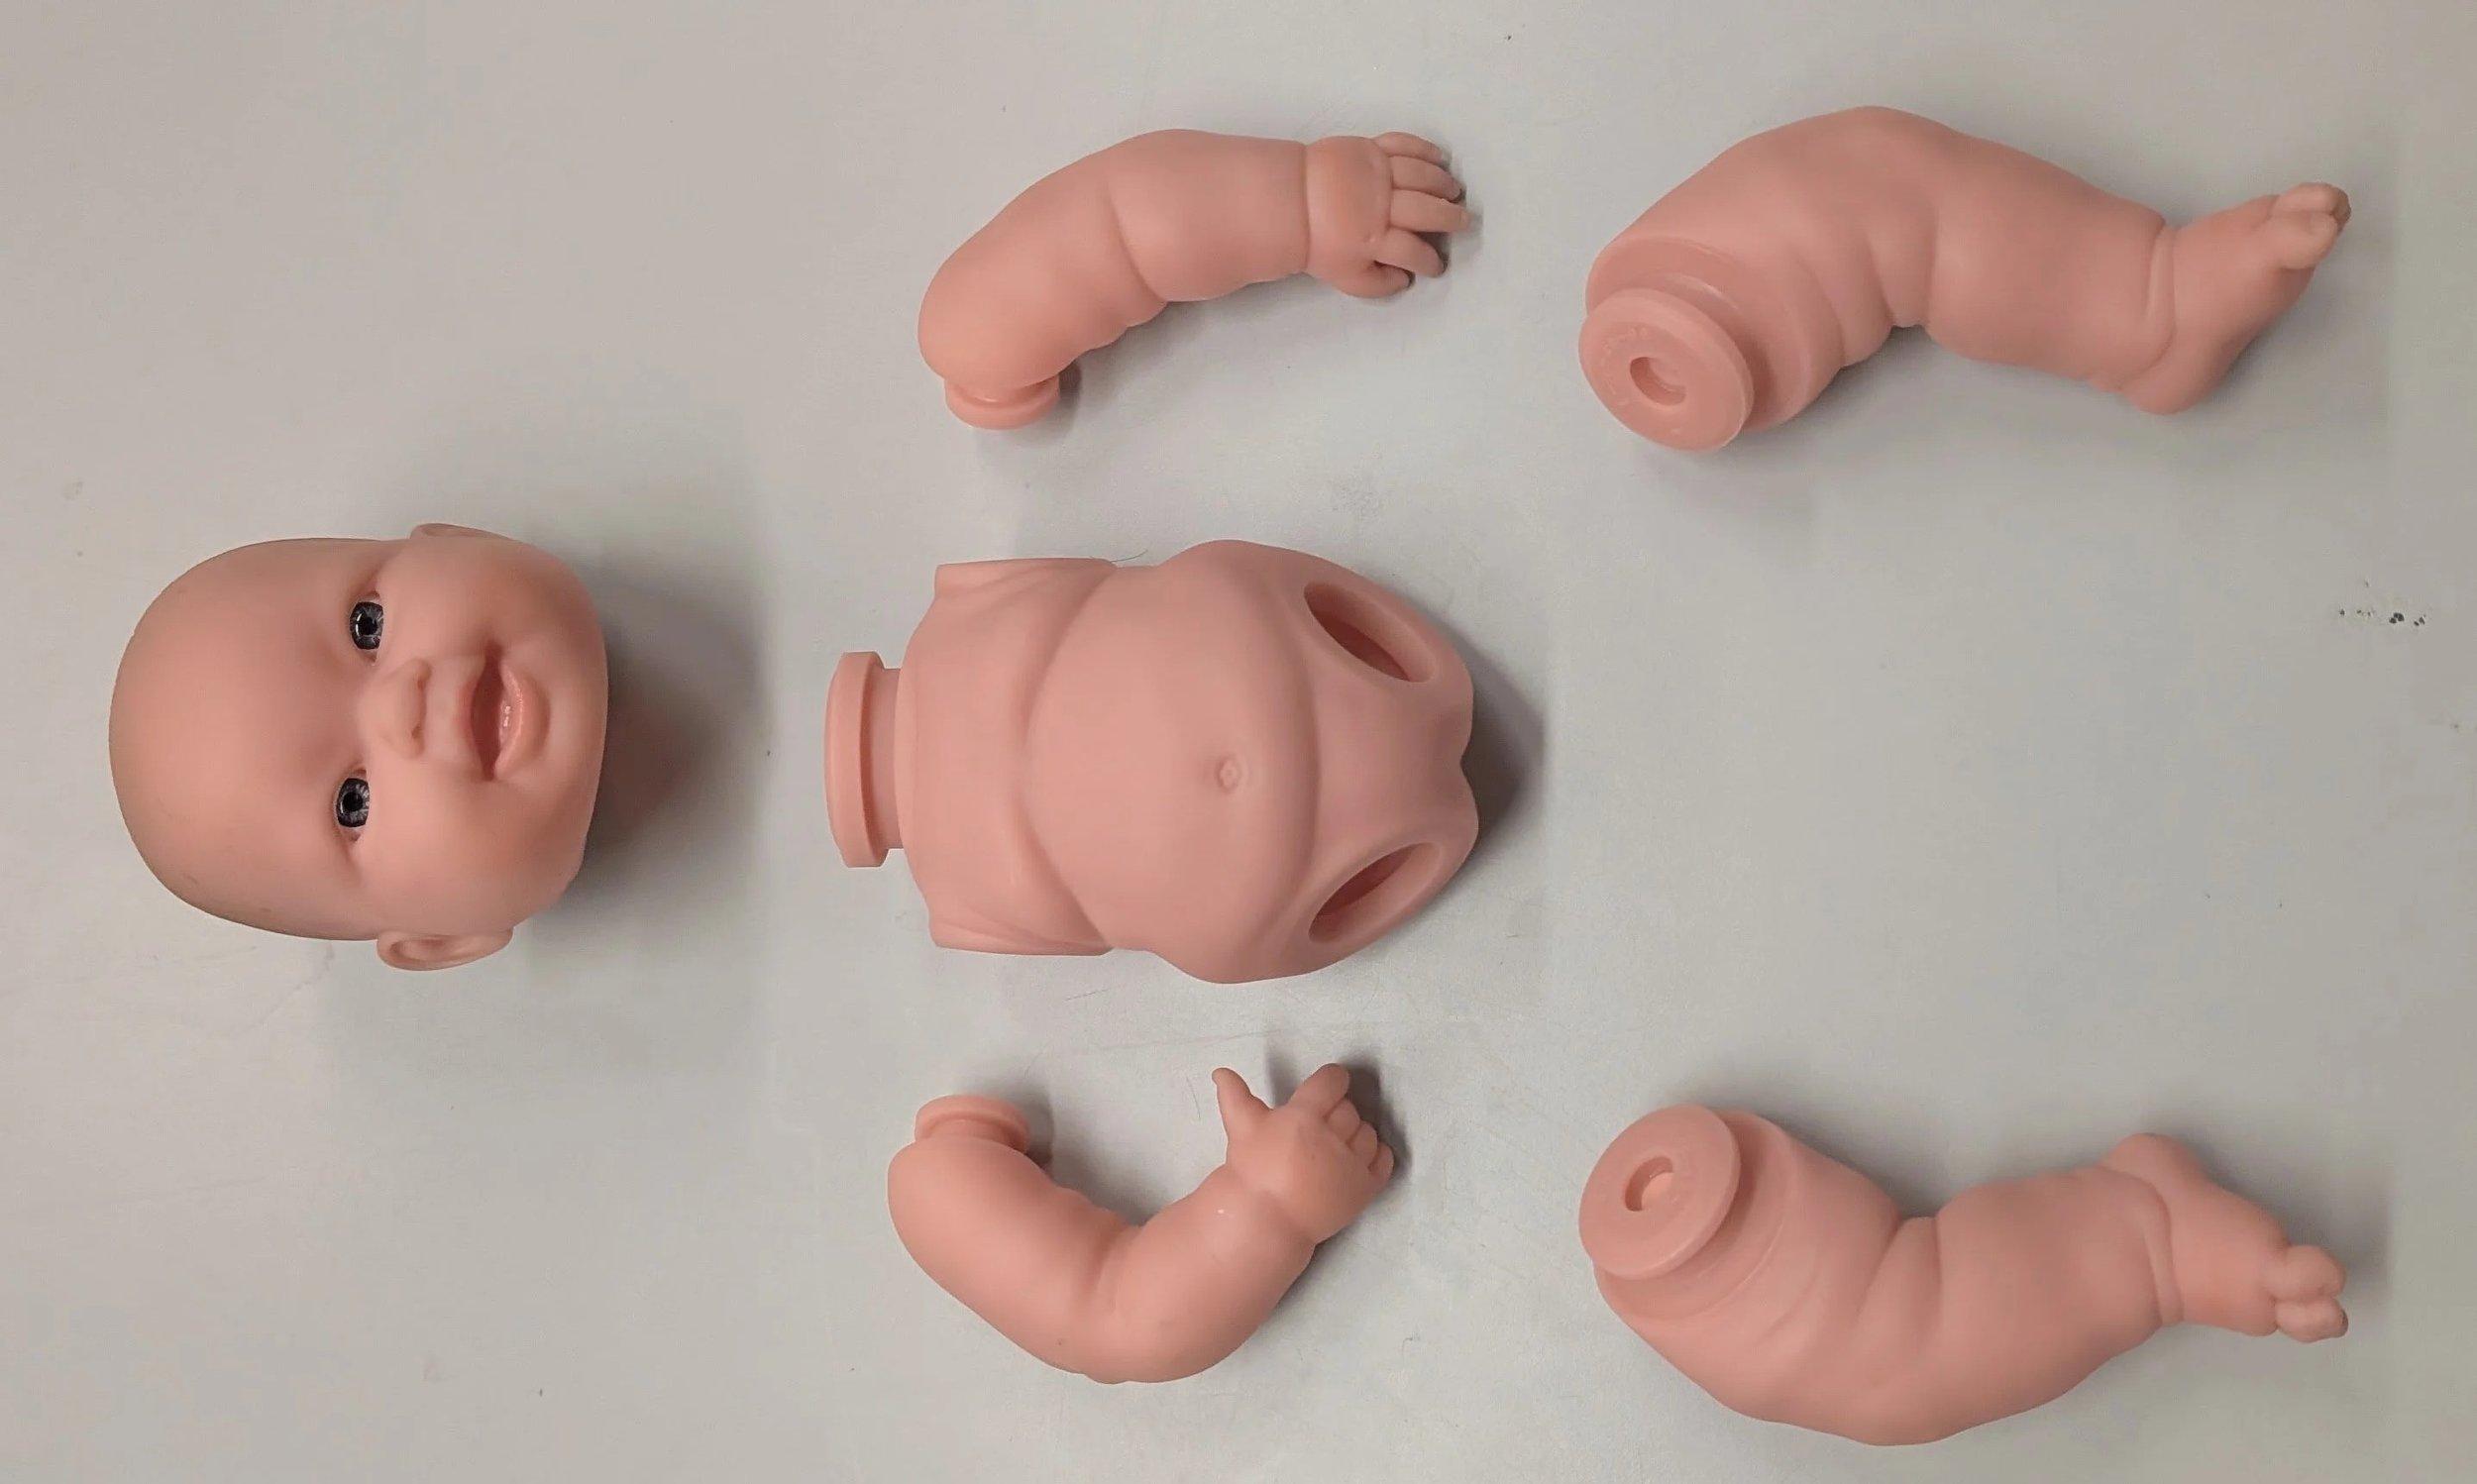
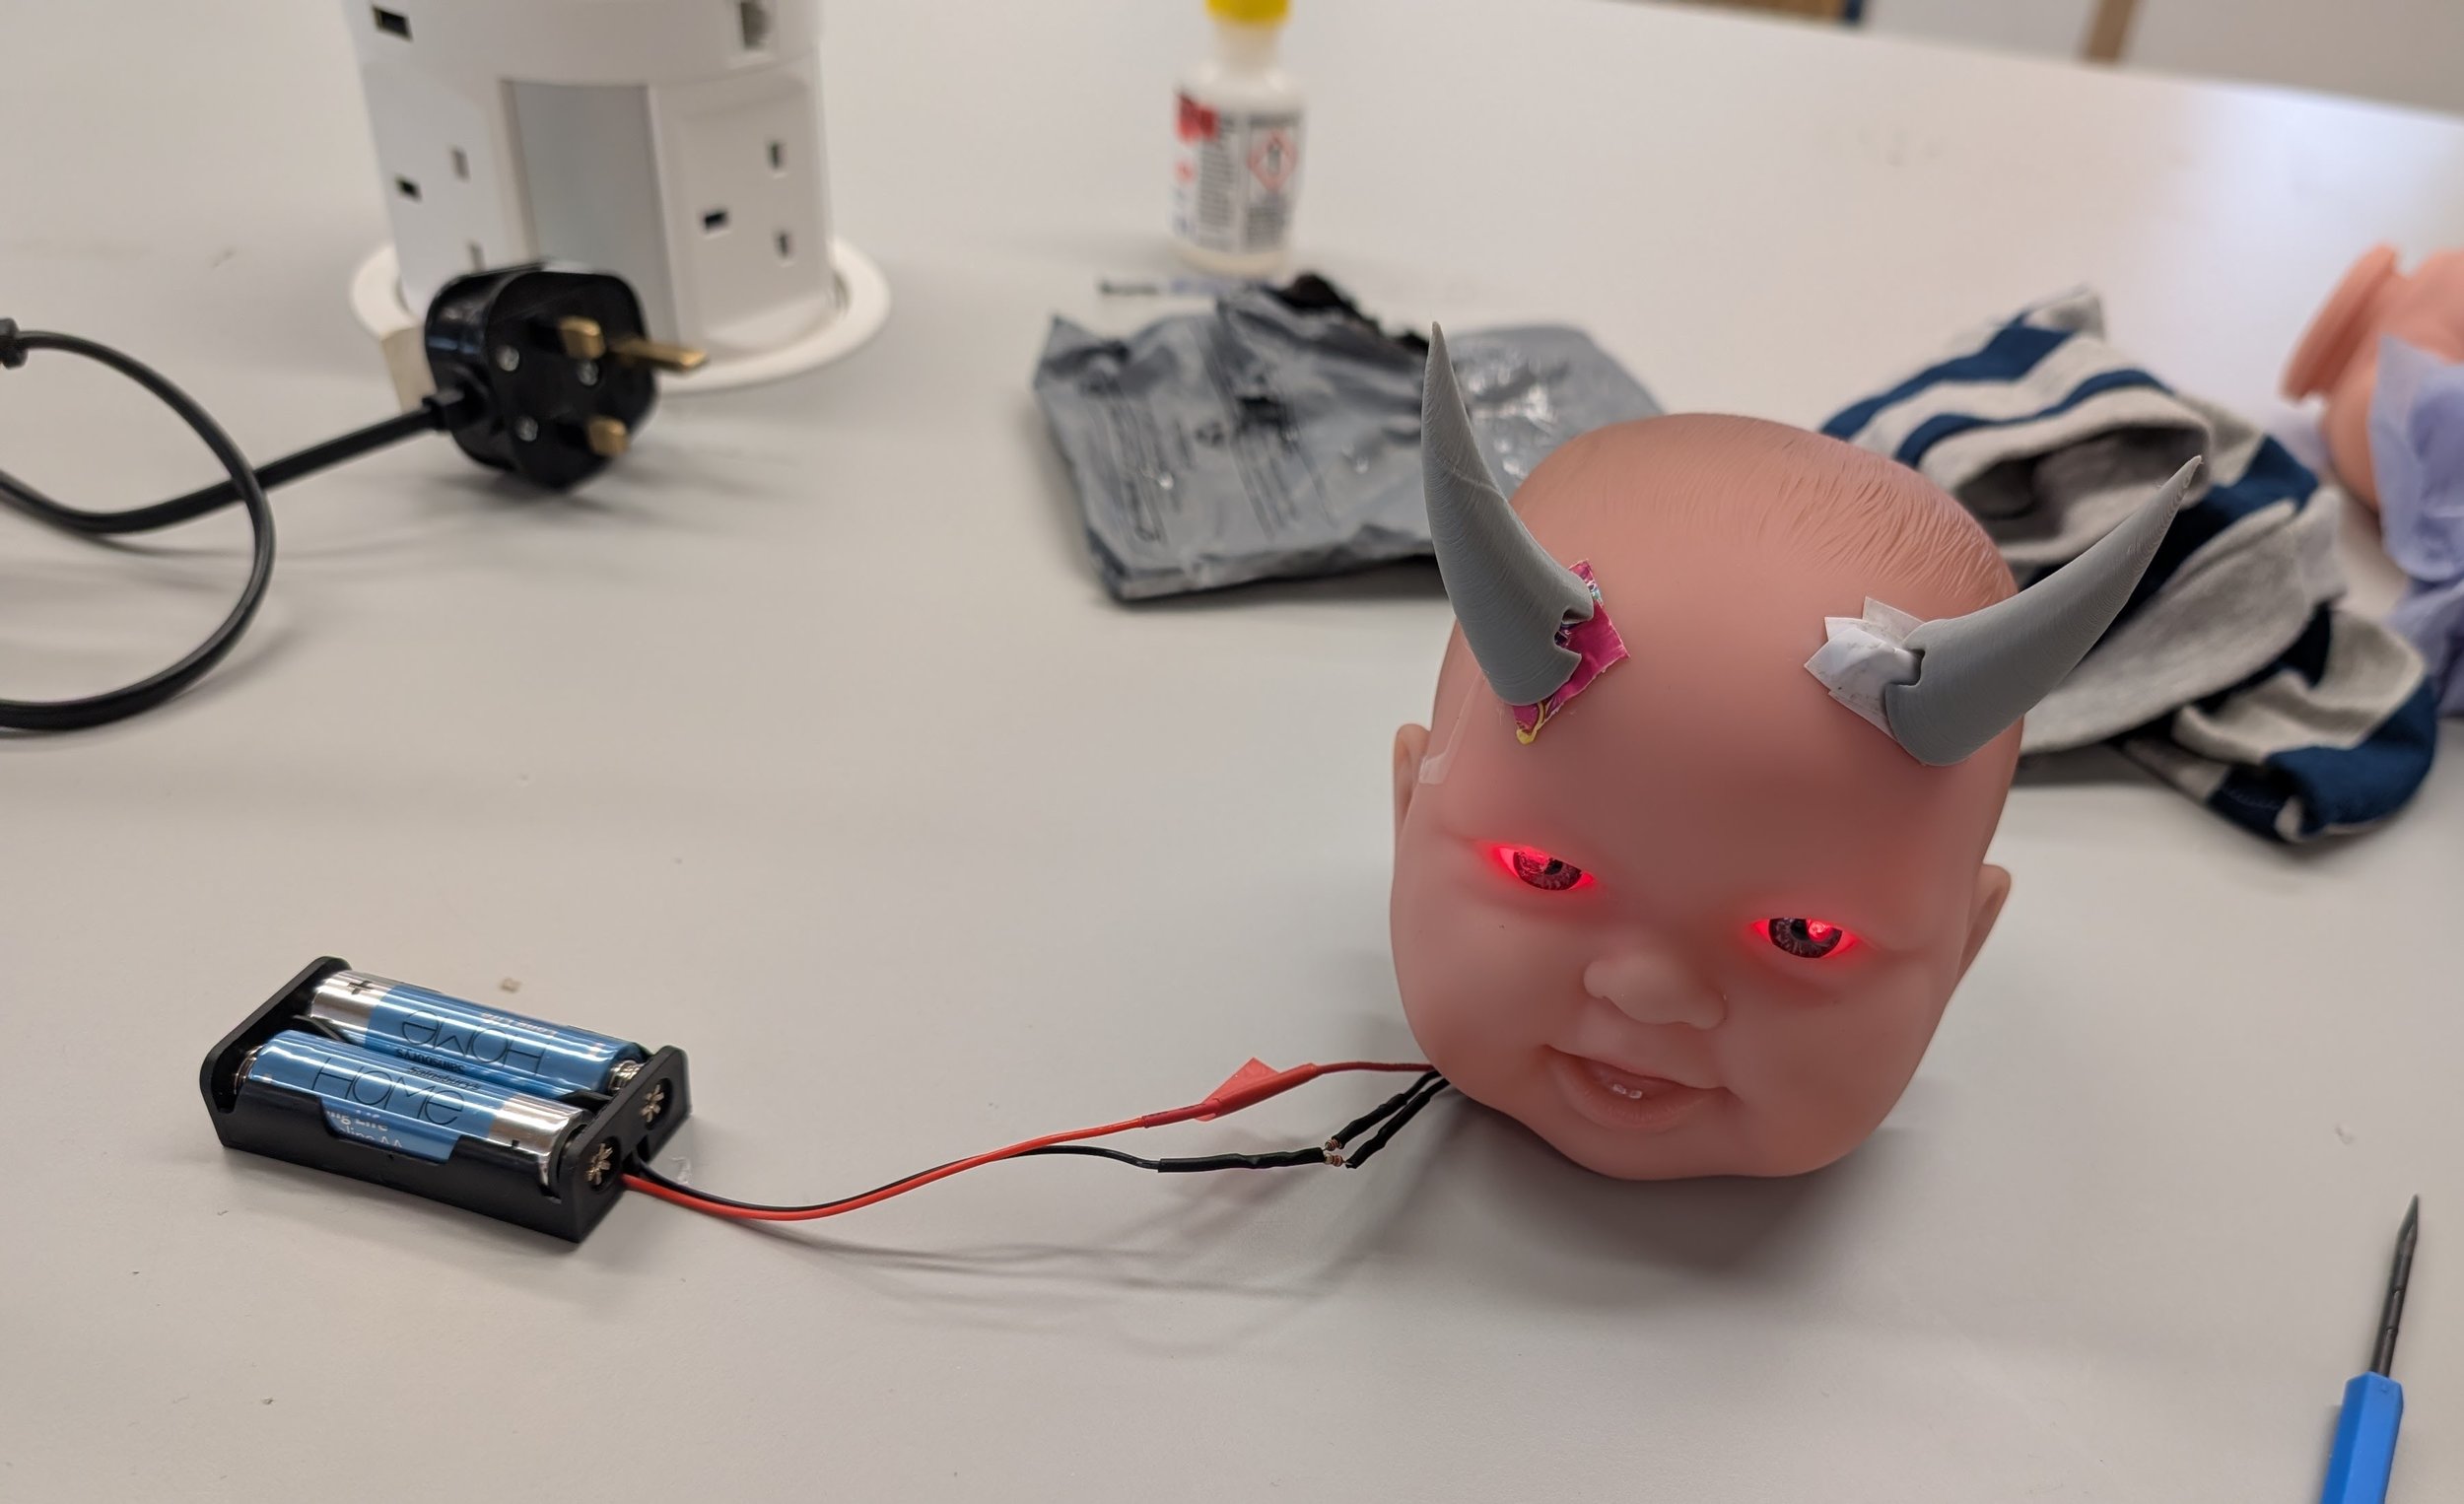
One of those is to take a toy bought from a charity shop and make it into something scary. I chose to take a baby doll and give it a satanic twist, making its eyes glow when you put devil horns on it.
Where did this project come from?
Where I started
I wanted to learn how to use Magnetic Reed Switches (MRS), so I decided this was the perfect project.
I decided to use an MRS to trigger LEDs I would put in the eyes, making it look like the eyes were glowing. After some brainstorming, I came up with the idea of adding devil horns that could contain a magnet.
I used a video from Science Buddies on YouTube:
How to Use a Reed Switch with Arduino (Lesson #30)
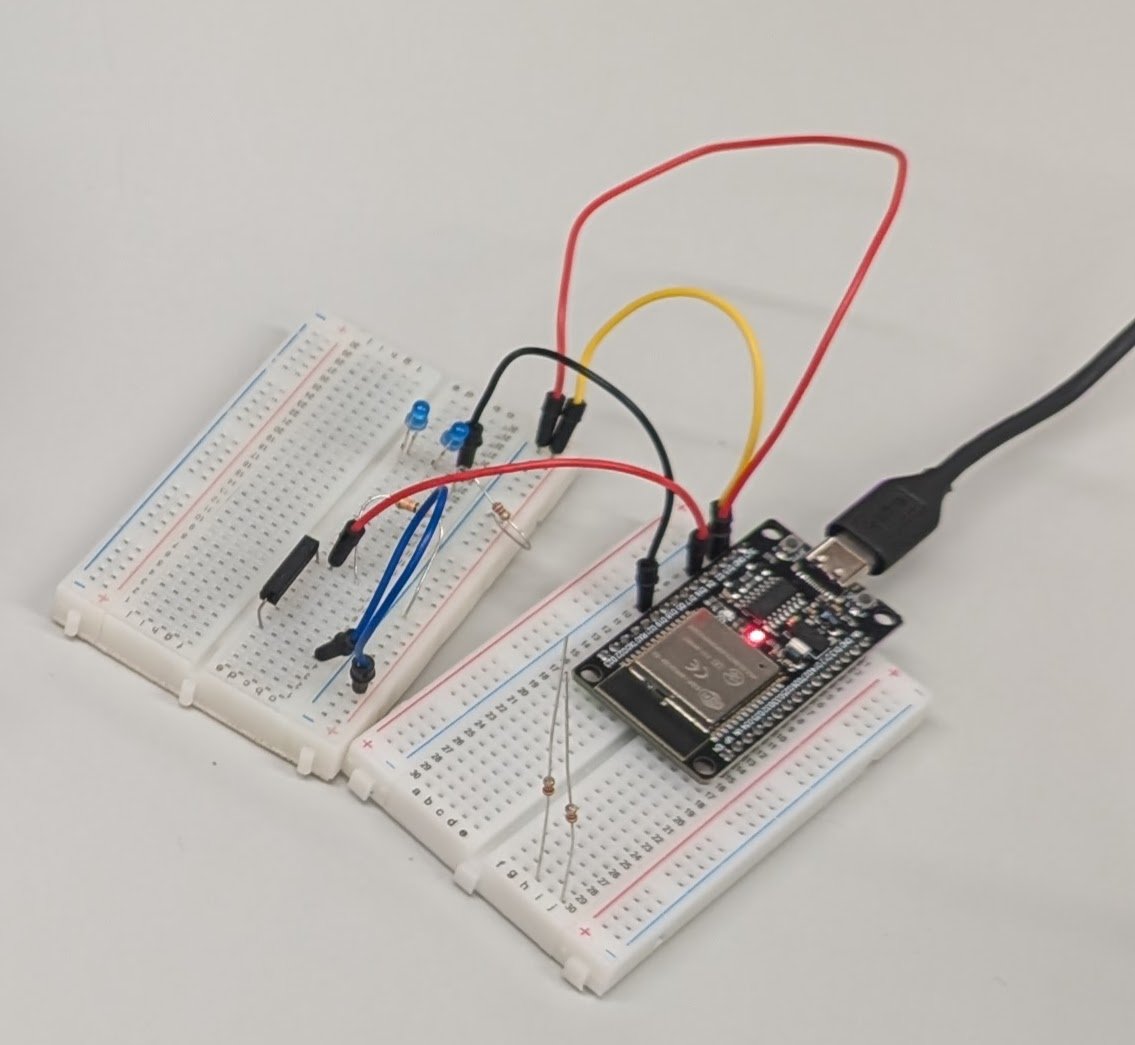
It taught me how to make an LED work using an ESP32. The components I used were:
220 Ohm resistor
10 Kilo Ohm resistor
2 LEDs
Magnetic Reed Switch
5 wires
ESP32
Breadboard
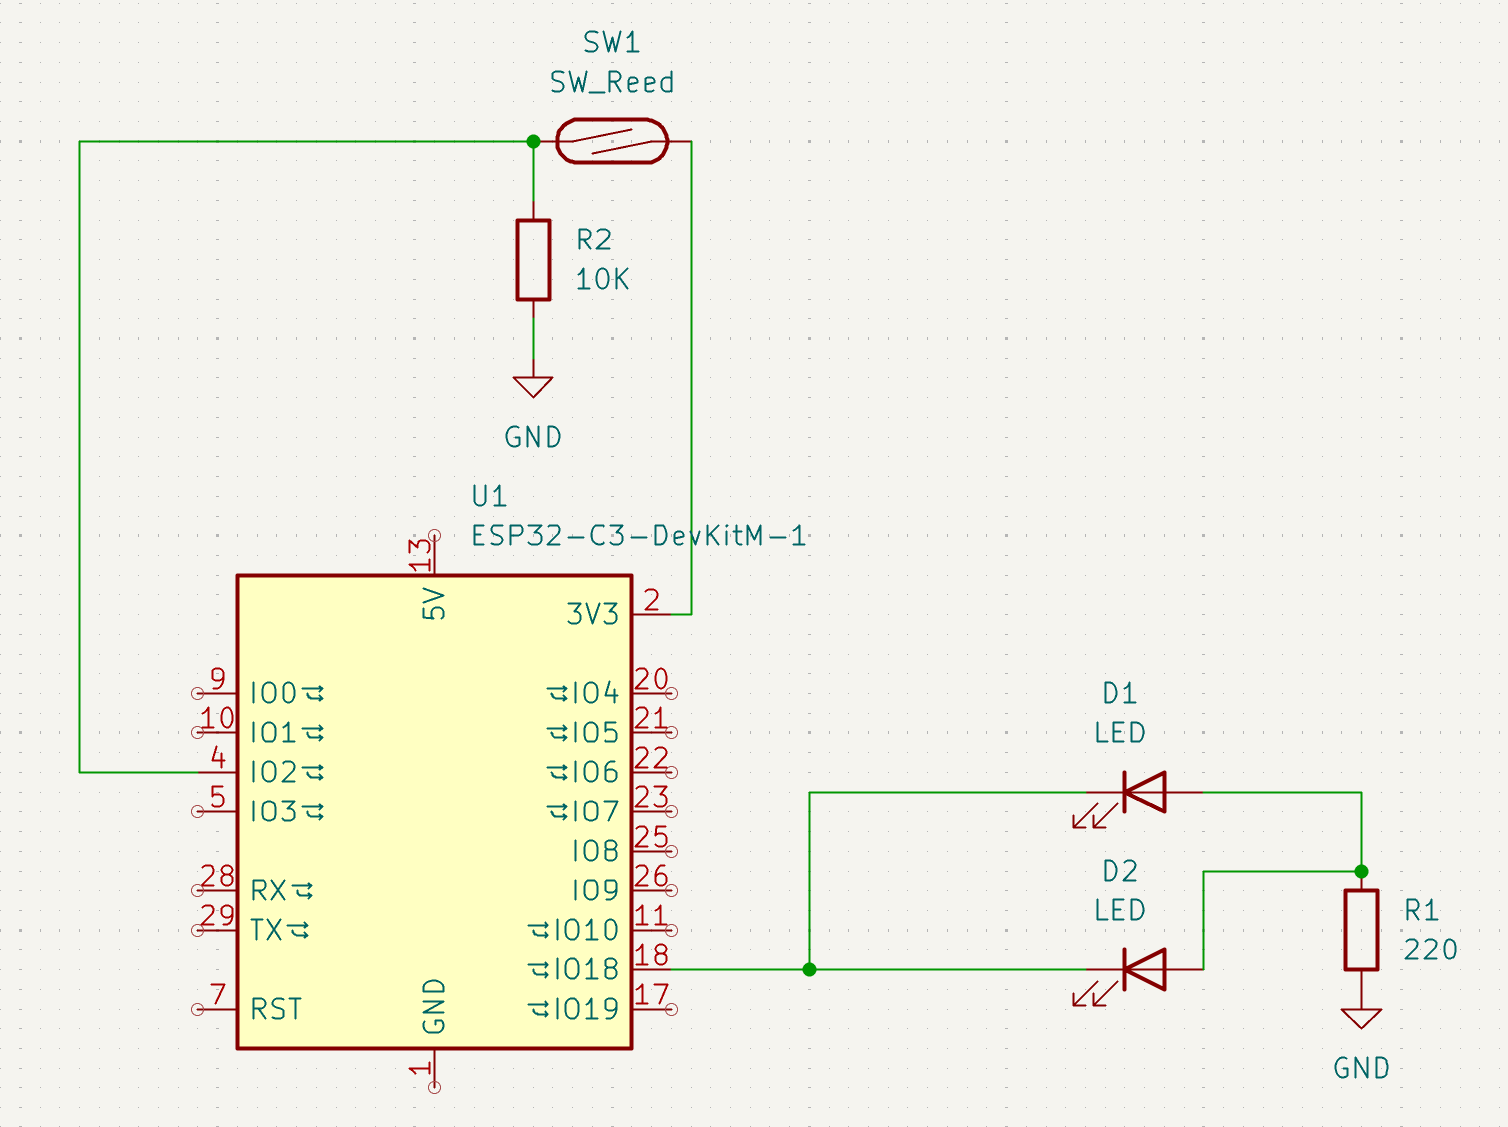
The Circuit Diagram for the circuitry built from the video
The Circuit Diagram that I built using the video
What did I do to The Baby
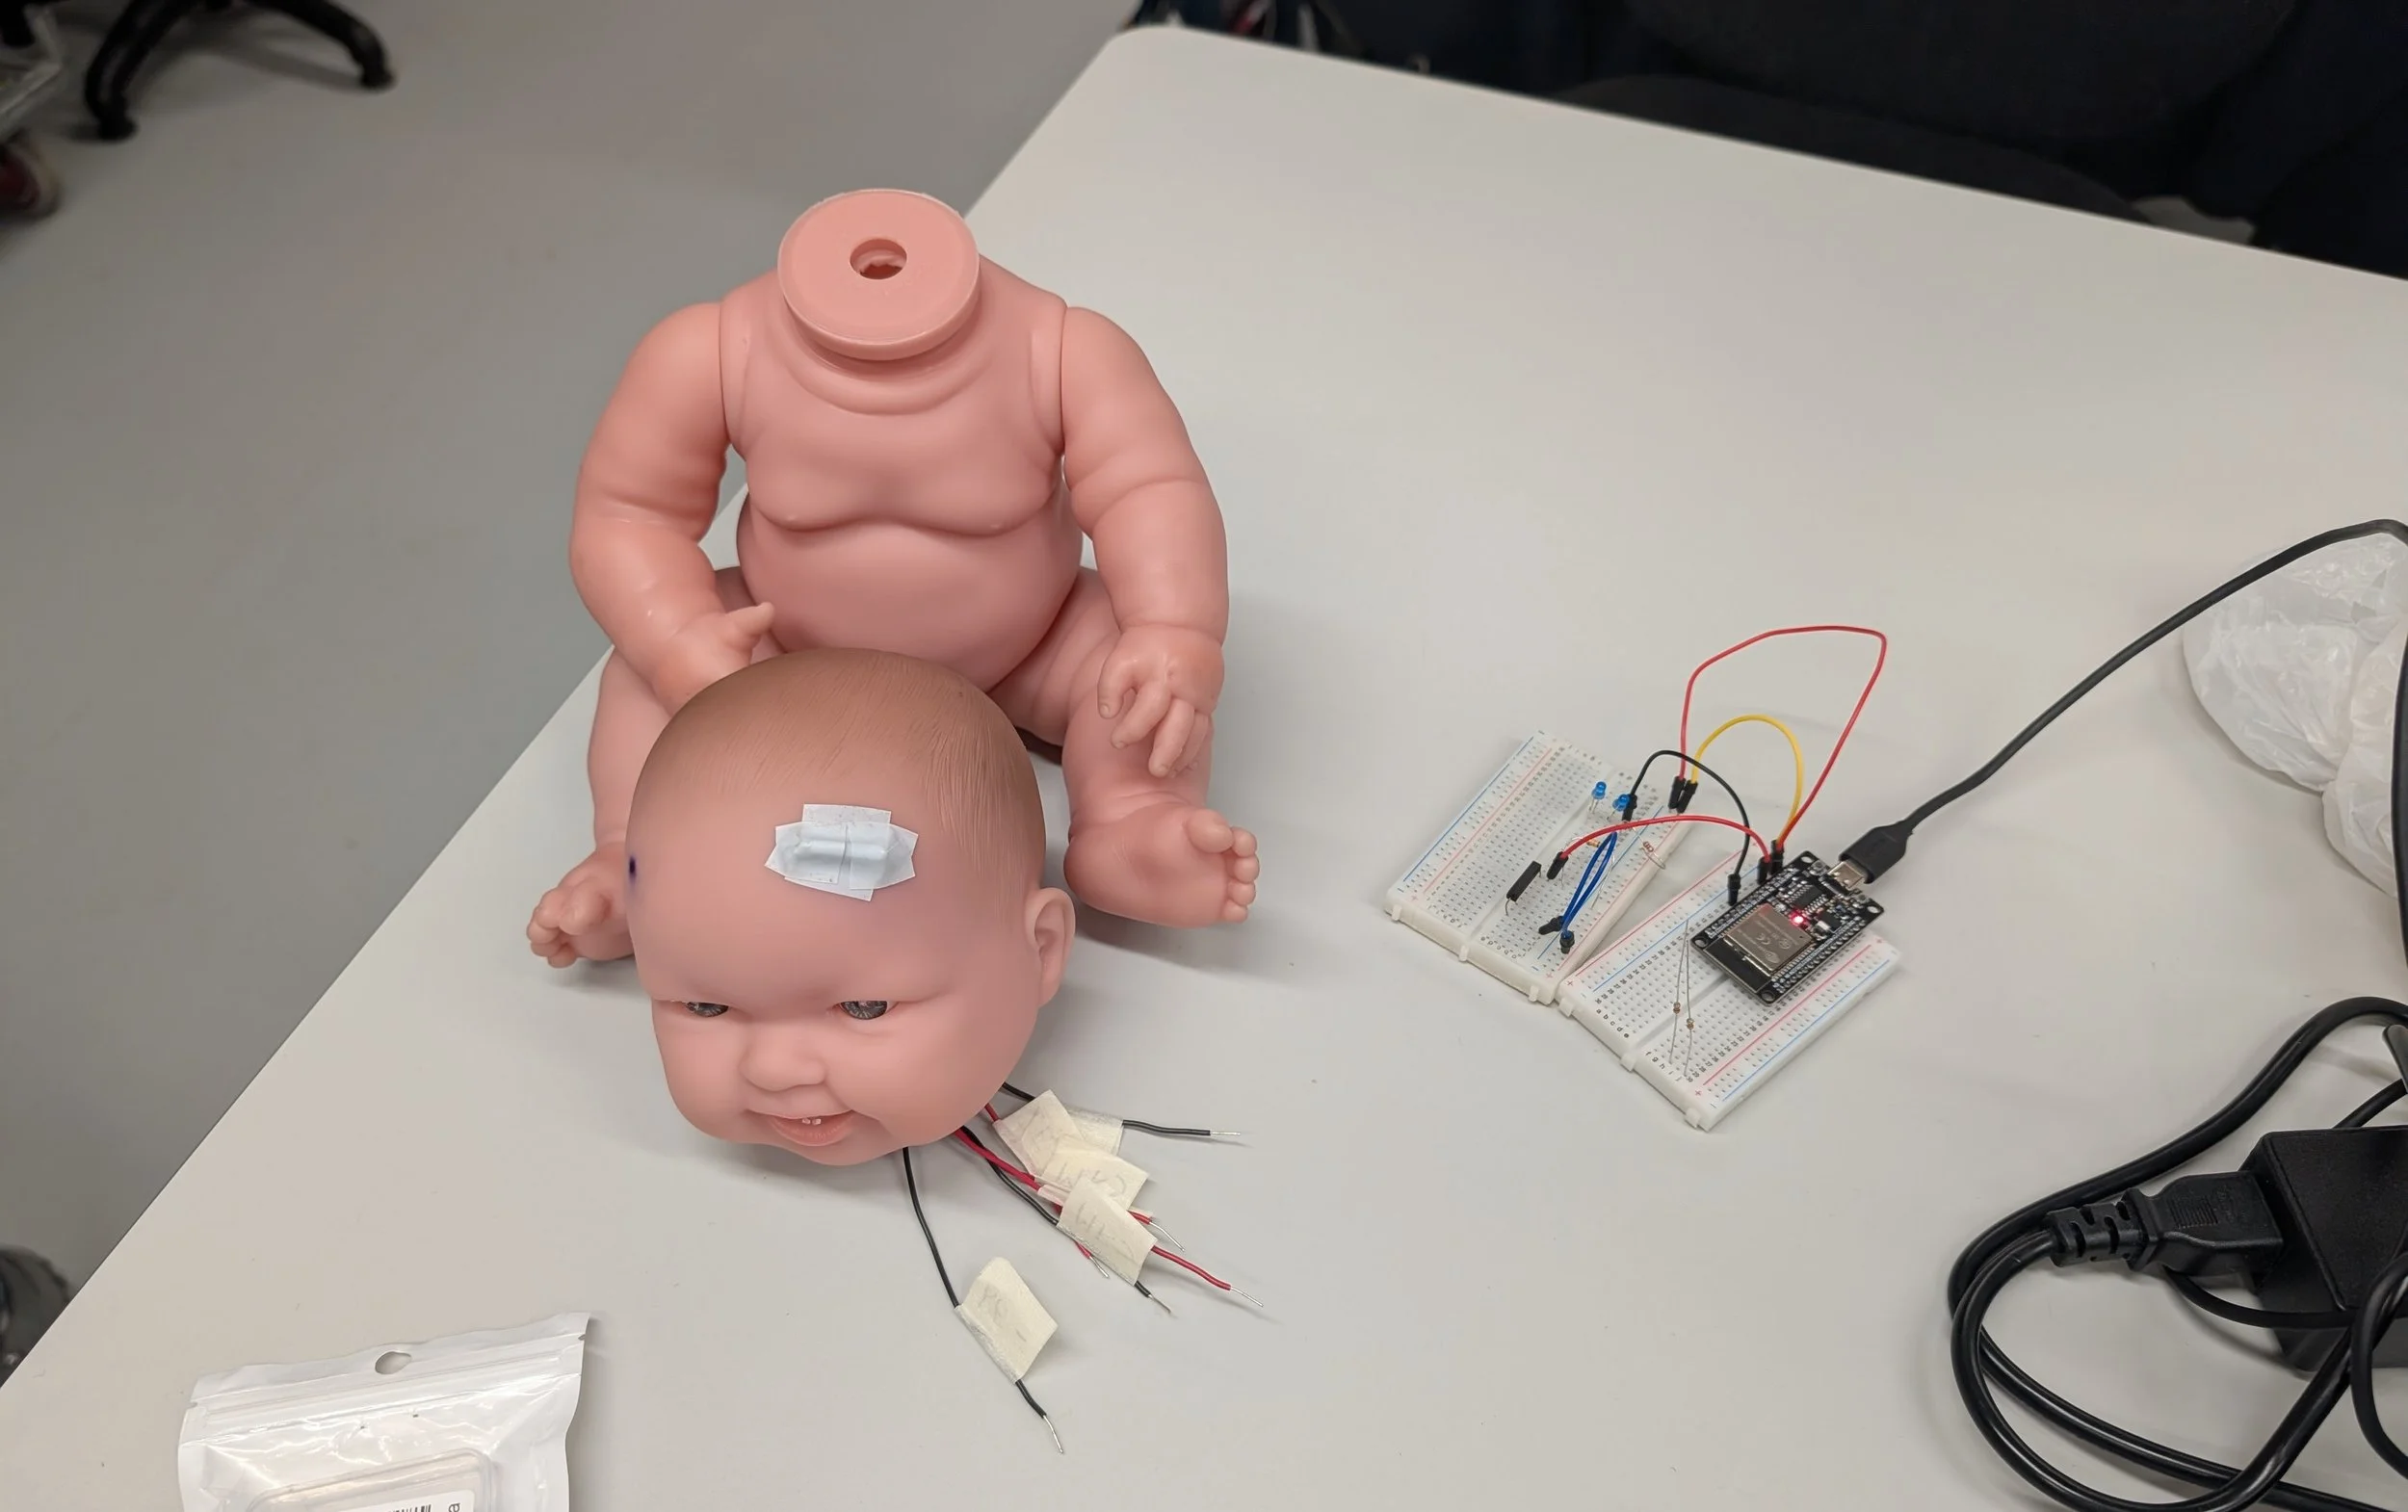
Once the circuit was built, I had to drill through the baby’s eyes to insert the LEDs. To do this, I had to remove the head. I used a pillar drill to make the holes, holding it in place with a clamp due to its odd shape.
Once this was done, I soldered the LEDs onto longer wires, allowing me to hot-glue them into the holes I had just made and reach the wires from outside the head.
I also had to find a way to attach the MRS to the head. For this, I tried hot glue, which just popped off as soon as it dried. The inside of the head is so shiny, so I tried sanding the patch on the inside, which also didn’t work, as the hot glue is solid against a flexible surface.
I also tried superglue, which had the same effect.
In the end, I used a tool to make holes in the head to run the wires through. Although I didn’t account for how delicate the switch is, and so by the time I had twisted and pulled at the wires I had soldered on, the MRS had snapped and no longer worked.
To fix this issue, I pulled out the original solution and tried again running the wires through the baby’s head first, then soldering the MRS to the wires. This worked, and I hot-glued the switch in place so it couldn’t twist and get damaged again. I also added electrical tape to protect it.
Getting the Circuitry into the baby
One of my friends at TinkerSoc pointed out that, for this project, I was in fact just using a switch and LEDs, so the ESP32 was just a power source. He showed me how to make a codeless solution that lets me replace the ESP32 as the power source with a standard battery pack, which would also be cheaper and likely last longer. It is a much lower-tech solution that will be easier to fit in the baby’s body.
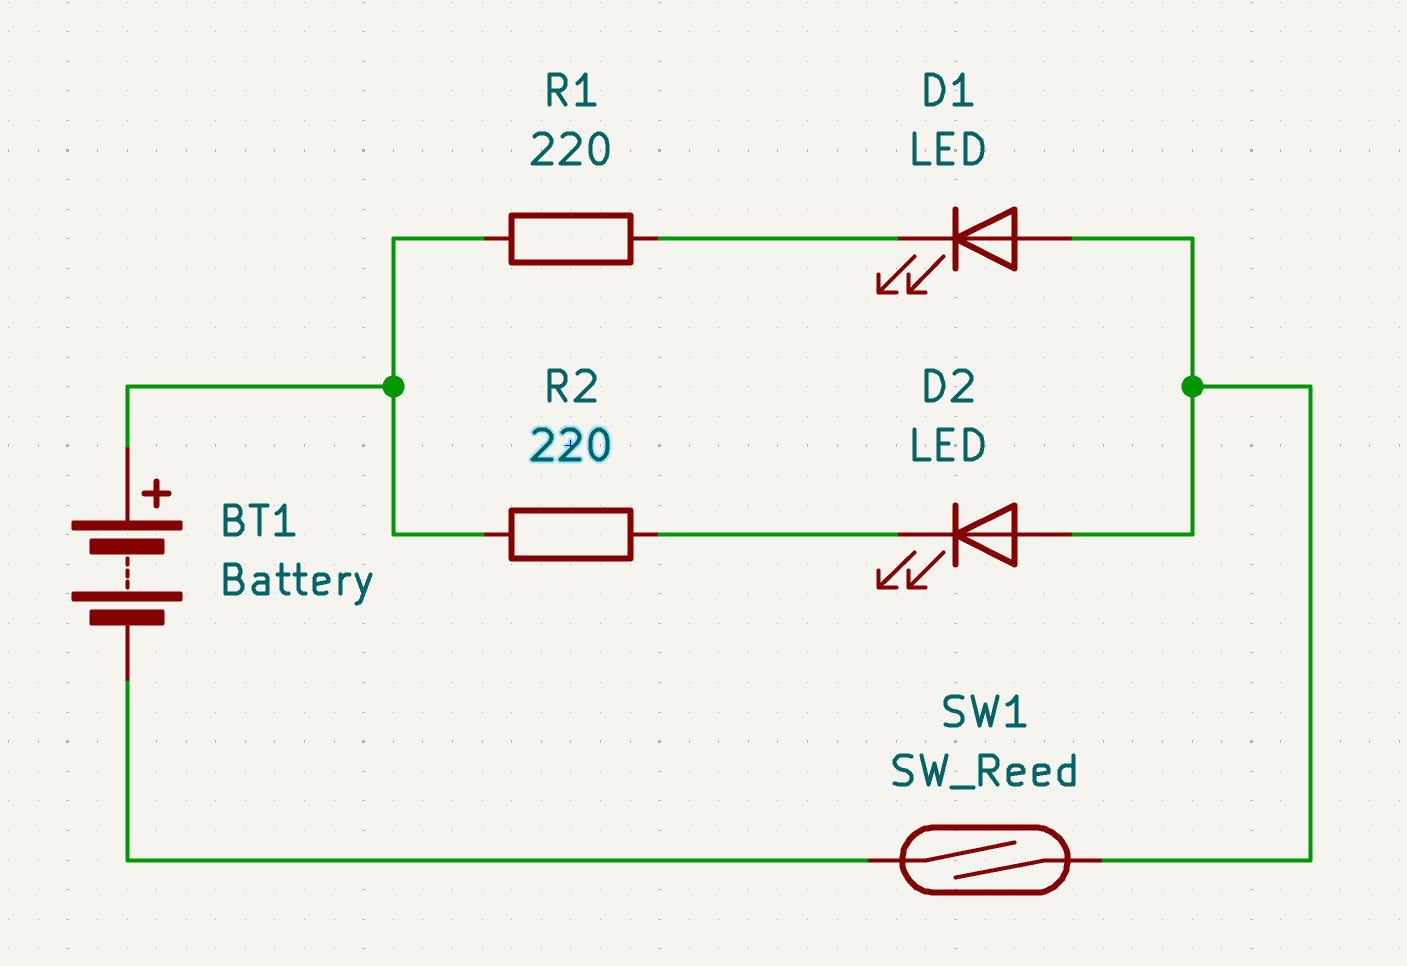
The Circuit Diagram my friend helped me make
Putting The circuitry Togeter
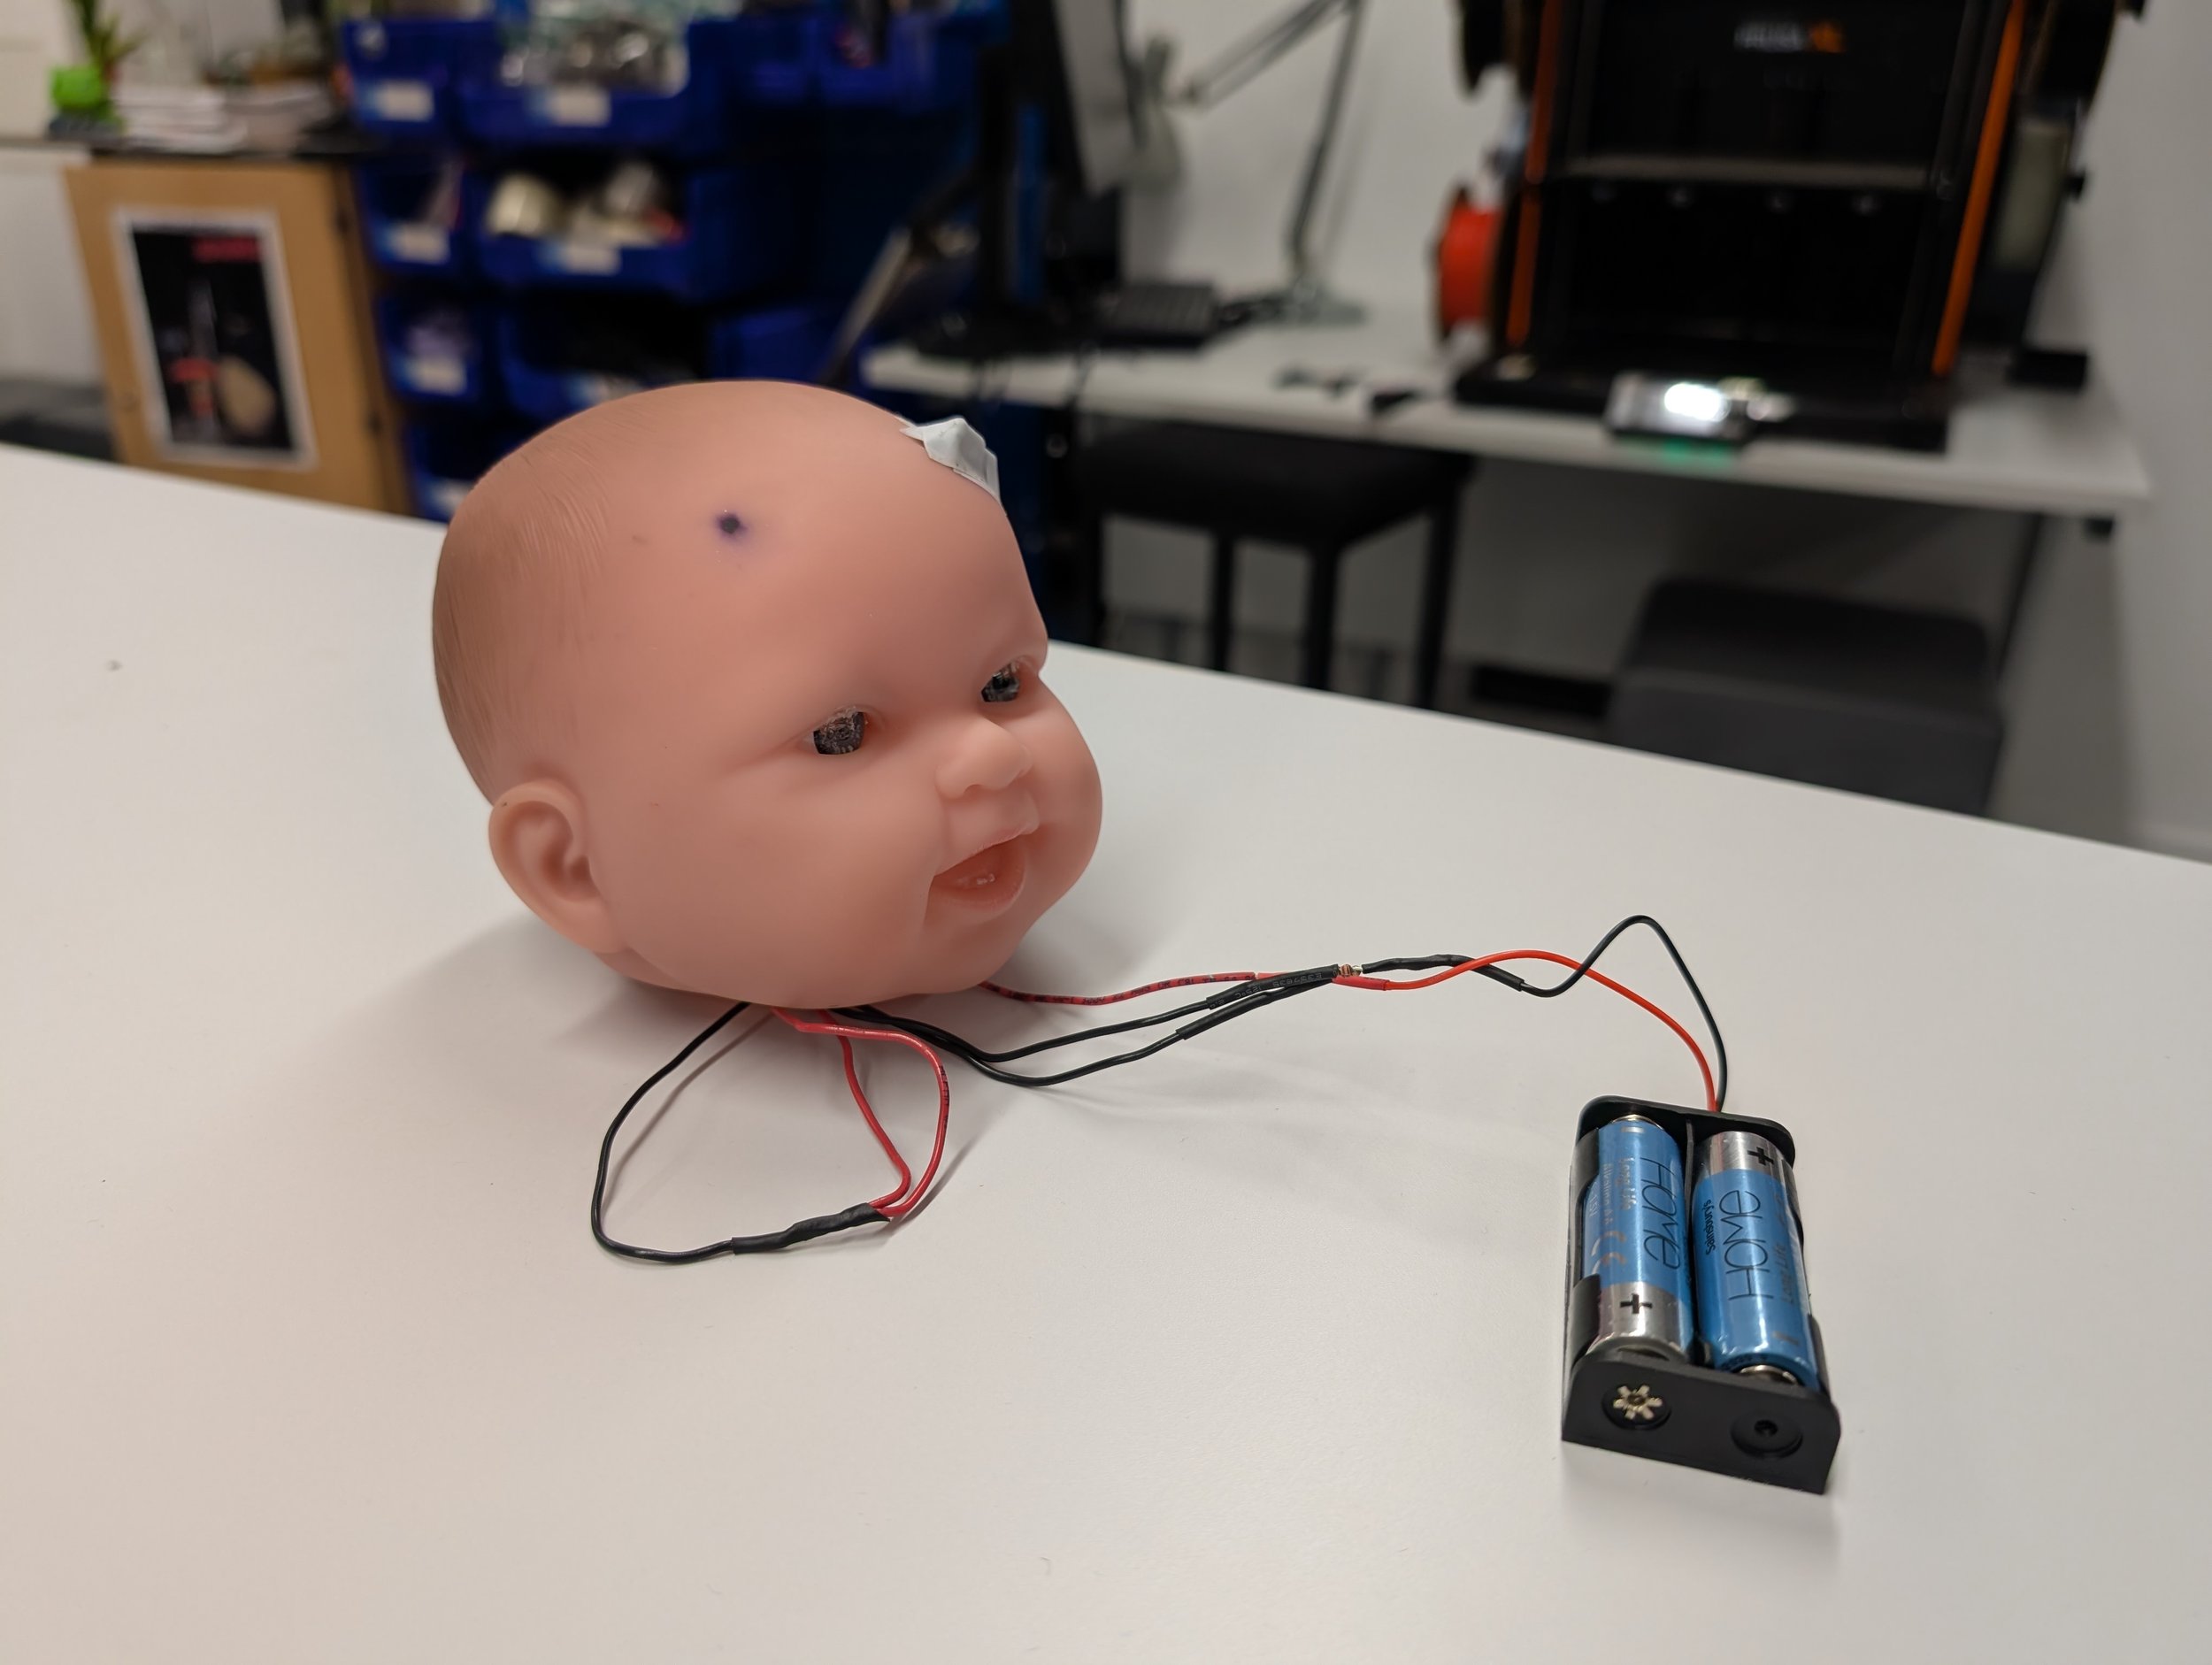
It was time to finally put together the circuit.
I connected all the wires with a soldering iron and covered the exposed parts with heat-shrink tubing. I did, however, realise at this point that I had made a mistake by using red and black wires to extend the switch leads, as it looked like I had connected a positive to a negative wire, which you should not do. Instead, I should have used another colour, like yellow, so it would have been obviously not directional.
The soldering went well other than this and the circuit works.
Building the Horns
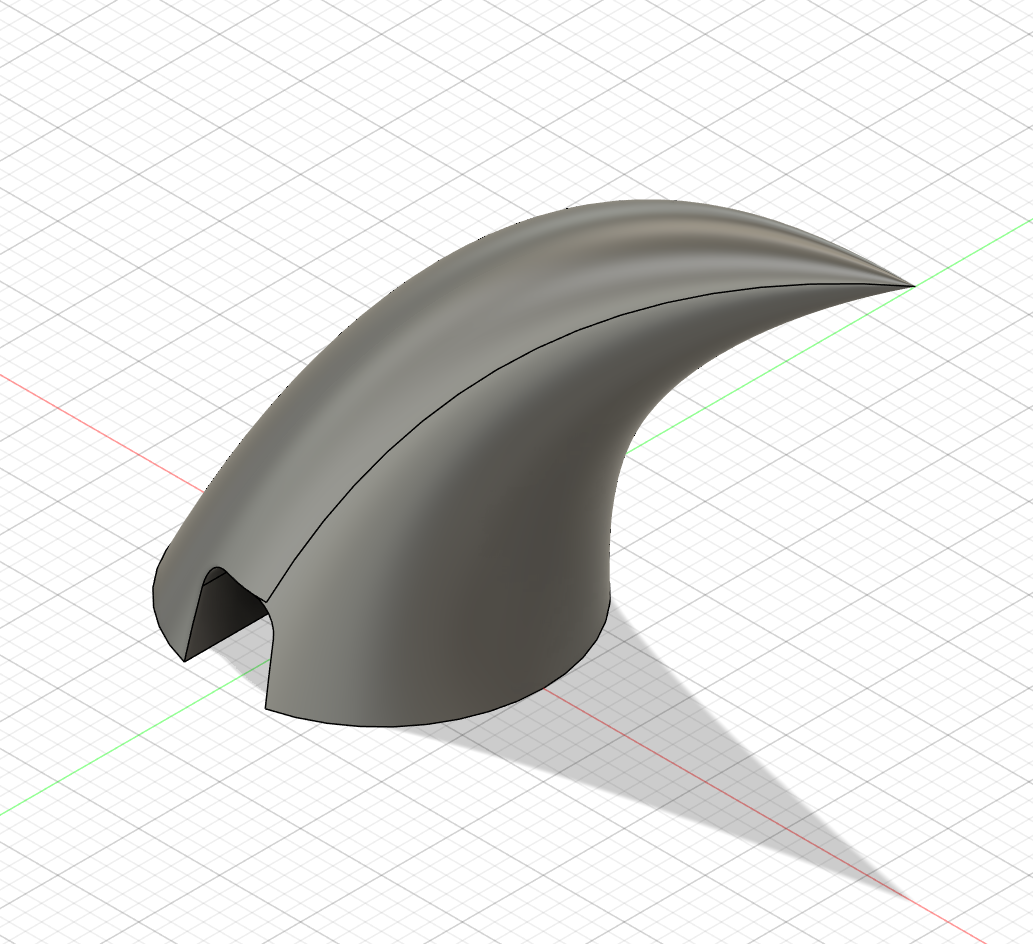
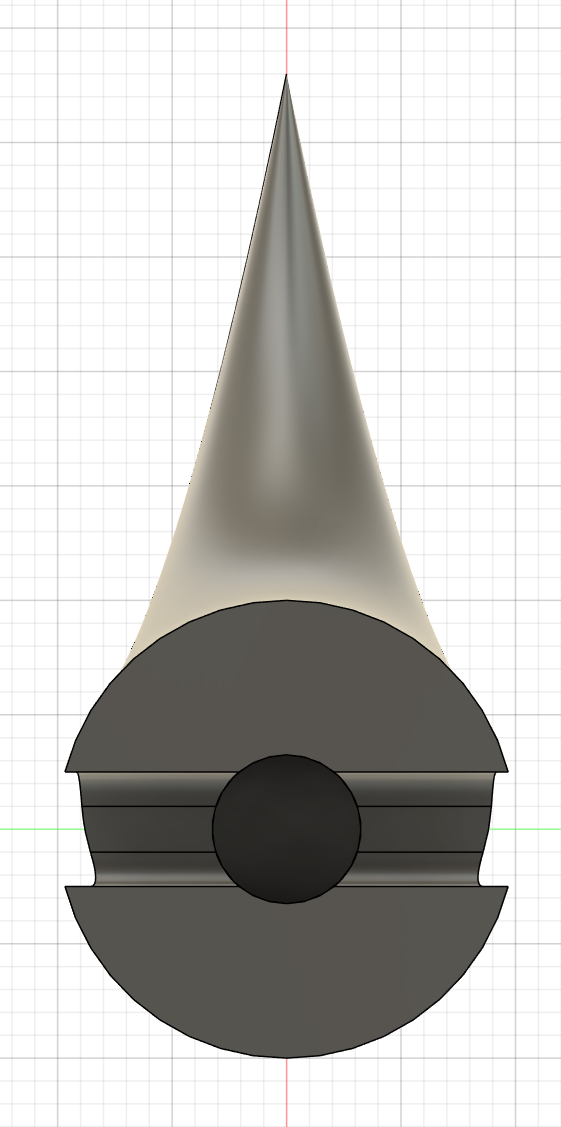
Once all the circuitry worked and the switch worked successfully with a magnet, the appearance and exterior needed making. Since the doll was already designed, this didn’t need to be done; it did need devil horns to become possessed. To do this, I created them in Fusion for the first time using the Loft function. I created a standard shape, then added a channel across the bottom so it could sit flush to the baby's head and go over the switch. It also needed a hole for the magnet.
Once it was designed, I printed it and glued in the magnets.
Putting it all Together
Once the horns were printed I tested them on the baby, which worked successfully, I also added a magent to the other side of the head so the doll could have 2 horns not just 1.
After testing again to make sure it worked, which did and looked amazing, I attempted to get the dolls head back on the box which I struggled with and inevitably asked for help with
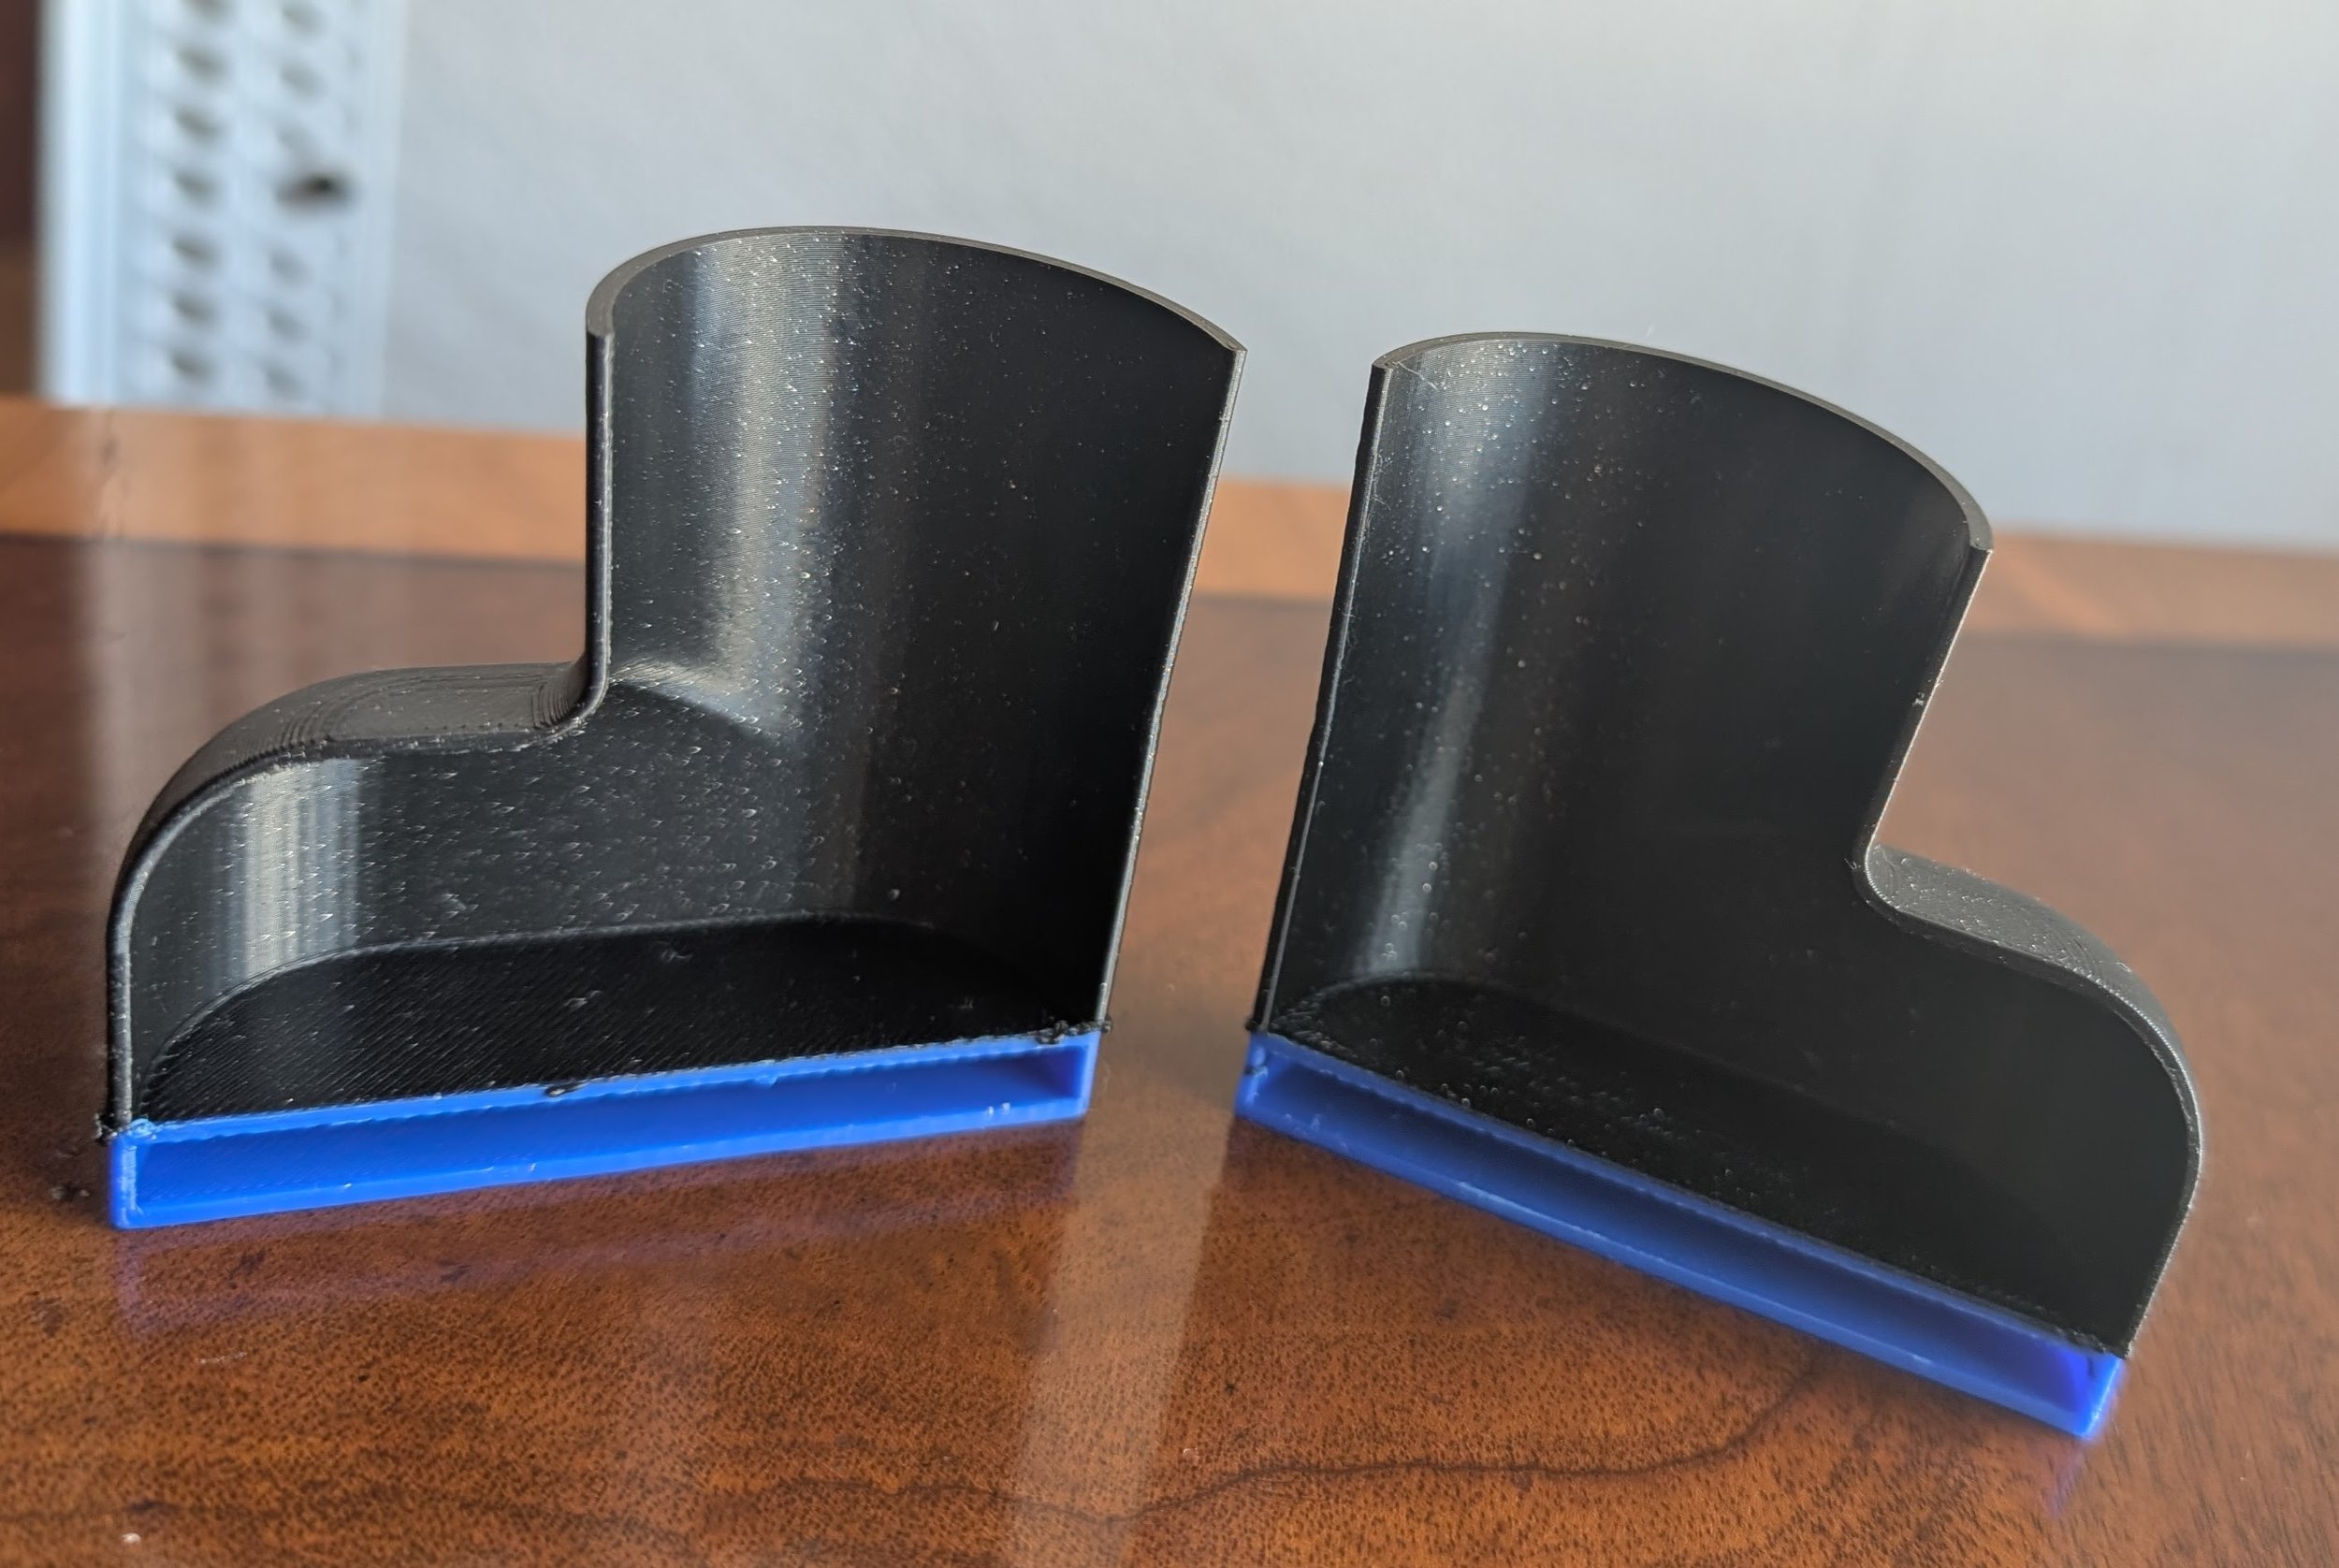
Once, I discovered that due to the circuit in the head, the doll was so heavy that it wouldn’t sit up, and so I cut a slit down the back of the doll and put a stone in it so it would sit up. And so I designed a set of welly boots with cavitys in the soles that can be filled with sand to weigh the feet down.
I printed these in 2 halves so that they could be filled with sand more easily.
I also gave the doll a hoodie to cover the slit on its back but also since it felt wrong to leave it naked.
I still need to fill the boots but other than that its looking pretty cute
The Almost Finished Product